|
The Scan Preview screen
Once a scan is completed, Scan2x will take you to a screen like the one below. This will allow you to preview your scanned documents before sending them off to their destination.
On the left-hand side under the heading Scanned Preview your scanned documents will appear in thumbnail form. As you click on the thumbnails one at a time, they will become highlighted, and a full view of the scanned page will appear in the main window.
If the scan needs some tweaking, the user can use the tools under the Advanced Tools bar to the left of the document. This shows the user several tool options such as turning the page 90 or 180 degrees, to zooming, fitting to page, or even eliminating pages altogether. It is also possible to re-order the sequence by dragging the pages around. For more information about the Advanced Tools, please see the Advanced Tools tab.
From the Scan Preview screen, sensitive information can be easily redacted before scans are finalized. Using the Redaction Tools, specific areas of the document can be selected and hidden from view. Once redacted, these sections will no longer be visible or included in the final output. Actions can be undone, all changes can be reset, or redactions can be applied to make them permanent. This ensures full control over the protection of confidential data directly from the preview window.
For information about keyboard shortcuts, please see the Keyboard Shortcuts tab.
Documents that are scanned in large batches may be split into smaller batches or even single pages. This can be done automatically, when Scan2x is programmed to recognise certain data or, if you are authorized to do so, you can insert an authorized separator sheet in between each document group. This sheet will be made available to you by your administrator.
.png)
The above screenshot is of a single document that has been scanned and processed. The left-most side of the screen shows that only one document was scanned.
.png)
The above screenshot shows that a batch of documents was scanned and recognised into multiple individual documents. Notice the left-most part of the screen now shows four individual documents.
.png)
Each of the multiple individual documents could be single-page or multi-page documents. The above screenshot shows a single-page document – notice the red box highlighting just one page for the document highlighted in yellow at the top left.
.png)
A set of tools can be used to rotate, zoom and manipulate pages within the document such as moving a page from one document to another. These are enclosed in the red box in the above screenshot.
.png)
Redaction tools can be used from the section marked in red in the screenshot above.
.png)
The right-hand side of the preview screen contains several command buttons and a list of metadata collected for the document highlighted in yellow at the top left.
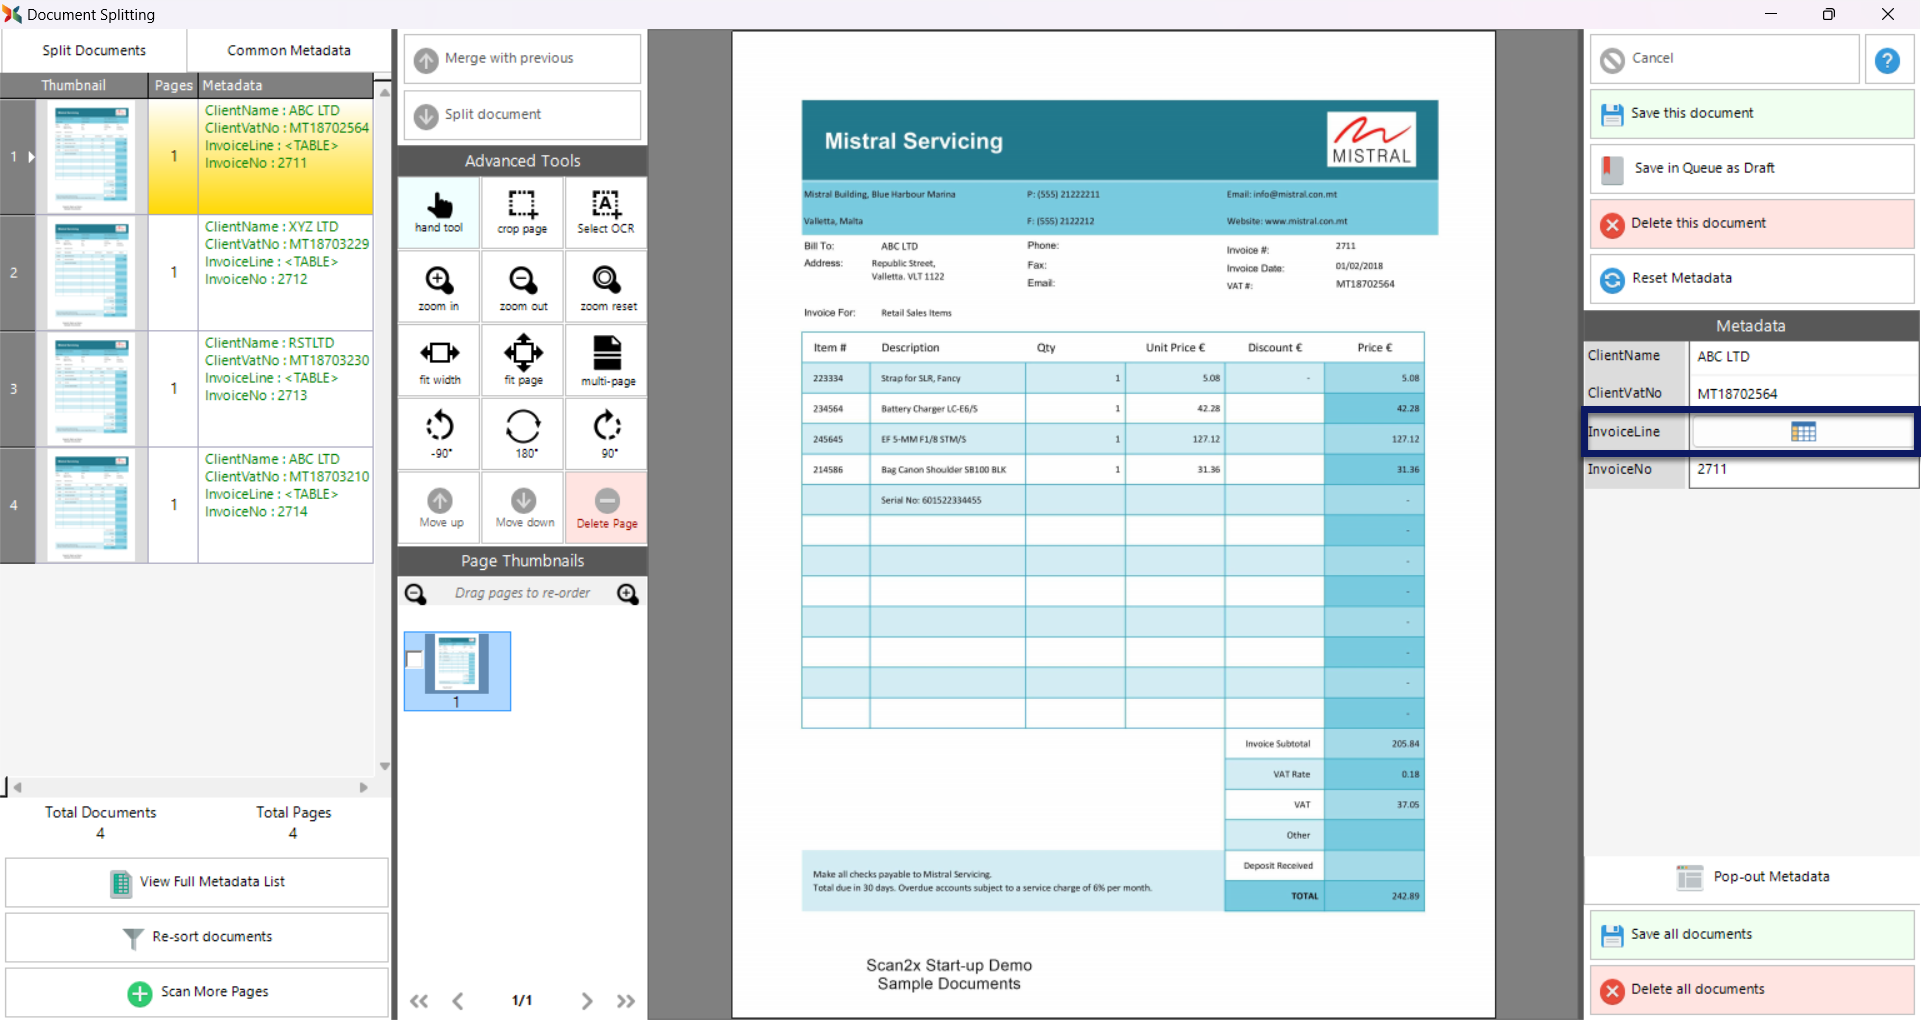
By clicking inside one of the metadata fields, it is possible to get additional feedback. In the above example, a metadata field populated from an OCR zone highlights the zone on the page and enlarges the section of document being subjected to OCR processing.
For tabular data in a metadata field, this is represented by a button which, when pressed, displays the tabular data in a grid as in the example below. In the case of the above screenshot, this button is shown highlighted in the blue box.
Users are able to:
•View the tabular information extracted from the document
•Edit information
•Delete selected rows
•Clear the information from the entire table
If any changes are made to the table that the user would like to save, they would click Apply in order to do so.
.png)
If you prefer to work with a larger window, you can click on the Pop-out Metadata bar at the bottom of the side panel. This will enable a larger central window to overlay with the same metadata and values to be filled.
Once you are satisfied with your entries, you can either click the green Apply button to attach it to the document or click the red Cancel button to remove the metadata window completely and return to the Scan Preview screen.
.png)
|