For each question, press the Add Question button and give the question a name. Each question created will become a metadata field in the document saved by Scan2x.
A new question record will appear in the Questions list on the left-hand side of the screen.
Select the question in the list and press the “Manage Question” button. The following screen will appear.
Then:
1.In the “Options” grid, type the letter “A” in the grey value column as at the figure on the left. This creates a placeholder for the first option in the selected question.
2.Using the “Click” tool at top-centre of the screen and, using the crosshairs, click on the first option of the current question on the document. Scan2x will mark the chosen spot by drawing a red highlighted box around the area to monitor.
3.Repeat Step 1 above for the second option for the selected question by choosing the second row in the “Options” grid. You will notice that Scan2x automatically populates the column with a “B”, signifying the second possible answer.
4.Repeat Step 2 to mark the position of the second answer option on the page. Again, Scan2x will mark the chosen spot by drawing a red highlighted box around the area to monitor.
In the question configuration screen options grid in the following screenshot, the standard A, B, C & D names for each question option have been replaced by custom names representing each possible answer: Earth, Venus, Mercury & Mars. To customize the names of the possible answers for each question, just overwrite them in the grid.
When manually selecting the answer options for a question, if you would like the OMR box to be smaller/bigger than the answer area (the red circle for Earth - Question 1) but Scan2x keeps automatically sizing the OMR box to the area, it is possible to switch the Auto-Size feature off by leaving it unticked.
The Move All Options checkbox allows the administrator to move all the OMR boxes for each answer of the question up/down/left/right simultaneously if needed.
Since the above question only has one answer that will be marked, in the Validation section, tick the 'Validate the only one ticked' option.
Unlike the question above, if there is a question which has more than one answer marked, in the Validation section, tick the 'Do not validation options' option so Scan2x will know it needs to look for more than one answer.
Finally, press the “Back to Document Setup” button to go back to the document screen.
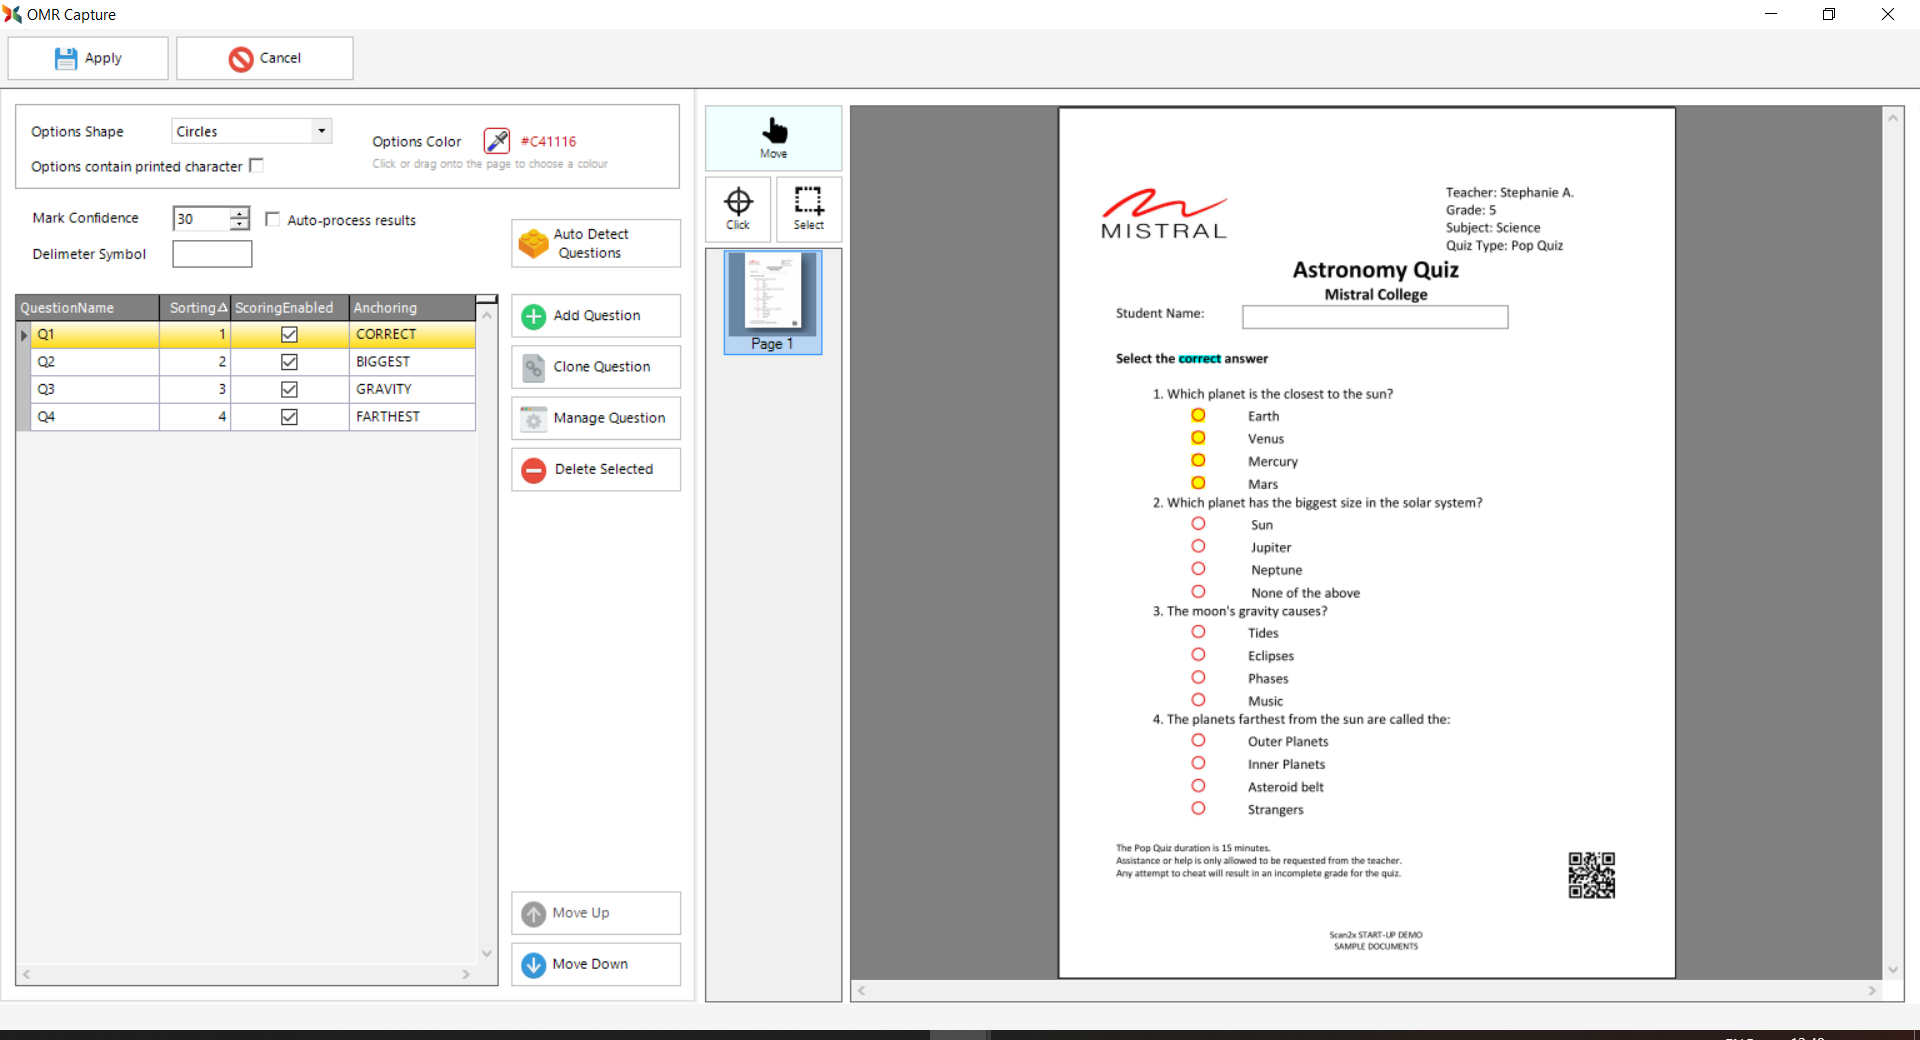
Questions added will be represented in the grid at far left, as shown by the red arrow below. Selecting a question will also get Scan2x to highlight the option positions as circled in the image below.
Once the OMR configuration is complete, it is necessary to add each question to the job metadata so that answers can be stored with each document. To do this, go to the Metadata Tab in the Job Configuration screen and hit the Insert all OMR Fields button.
TOP TIP: It is essential that templates are designed, saved and printed in the same size – i.e., If the template is designed for A4 sheets then it must be printed on A4 paper with the printer driver set to 100% size, not “fit to page” or “shrink to fit”.
.png)
.png)
.png)